Ever found yourself at a loss for words? We’ve all been there! But guess what? There’s a solution that’s as fun as it is effective – GIFs! There’s a GIF for every mood and moment. Feeling ecstatic? Slam that GIF on there! Can’t quite put your finger on that emotion? Yep, you guessed it – GIFs got your back. It can be your response to something in the most humorous yet relatable way.
And the coolest part? You can actually make your own GIFs, no matter if you’re a tech guru or a total newbie. Forget about complicated software – with many easy-to-use apps at your fingertips, you’ll learn how to make a GIF like a pro in no time!
Stick with us, and we’ll walk you through the ins and outs of how to make a GIF in 2024.
Want Your Gifs to Do More Than Just Loop?
Bring Your Gifs to Life in Every Post You Upload With Social Champ.
What Is a GIF?
Are you one of those who rush to Google to double-check the pronunciation of ‘GIF’ every time? The age-old debate of “GIF” versus “JIF” might have left you scratching your head, but let’s cut to the chase – it’s pronounced as “gehf.” Got it? Great! Now, let’s explore what exactly a GIF is.
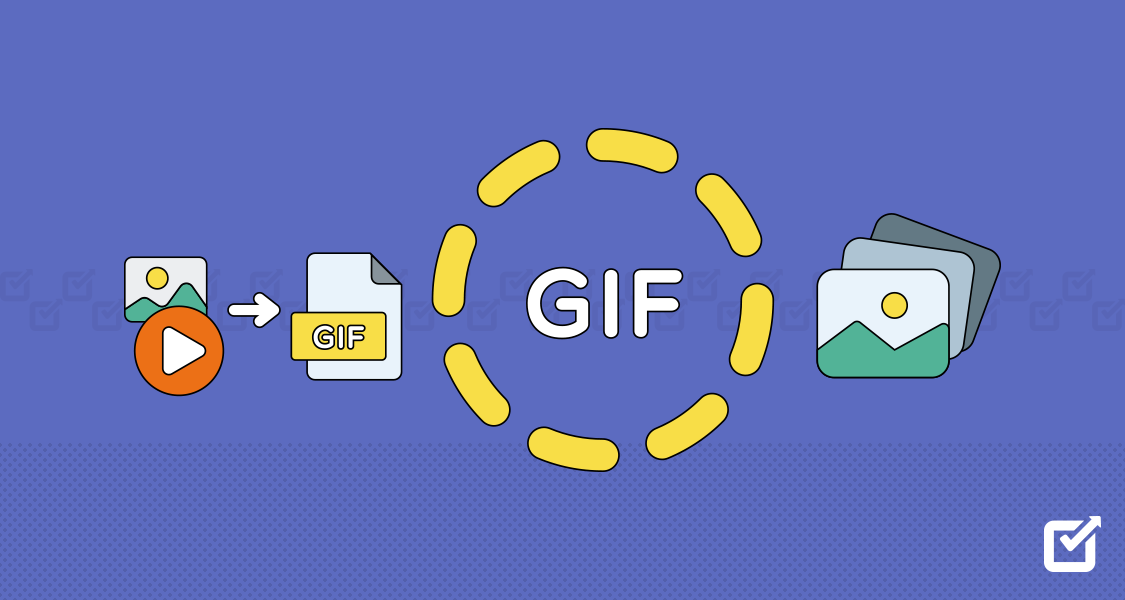
At its core, a GIF is a sequence of images or short video clips that play on a loop without sound. Standing for “Graphical Interchange Format,” it’s become a staple in today’s media landscape.
While emojis have their charm, GIFs take reactions to the next level – they’re like the universal language of expression, transcending even the boundaries of extraterrestrial communication! Okay, maybe that’s hyperbolic, but you get the gist.
From cringe-worthy memes to iconic TV moments, the world of GIFs is vast and varied, offering a universe of possibilities for expression. And here’s the kicker – you can even create your own!
Now that we’ve demystified what GIFs are, let’s explore GIF-making.
How to Make a GIF?
So, let’s talk about making GIFs! It’s not as tricky as it may seem – with just a few simple steps, you’ll be a GIF creator quickly.
Now, what exactly is a GIF? Well, it’s like a mini-movie that plays on a loop, freezing a funny moment or reaction in time. Think of that classic cat fail or the guy with the epic double-take – yep, those are prime examples of GIFs doing their thing!
Now, onto the fun part – making your GIFs. Here’s a simple breakdown of how to do it:
- Choose Your ContentDecide what you want your GIF to be about. It could be a video clip, a series of photos, or a combination of both. Just make sure it’ll get a chuckle or a reaction from your audience.
- Pick Your ToolIf you’re on your phone, there are tons of apps out there that make GIF-making a breeze. Think GIPHY Cam or GIF Maker. Or, if you’re on a computer, you can use software like Photoshop or GIMP for more control over your GIFs.
- Get Creative
Once you’ve got your content ready, it’s time to add some glamor! Add text, stickers, or filters to make your GIF stand out. Experiment with different effects until you find the perfect combination. - Edit and Refine
Don’t be afraid to play around with the timing and speed. You want it to loop smoothly and capture attention, so take your time with this step. - Save and Share
Once you’re happy with your creation, it’s time to show it off to the world! Most GIF-making tools let you save your GIF to your device or share it directly to social media platforms like Instagram, Twitter, or Facebook.And hey, don’t stress if your first few GIFs aren’t perfect. Like anything worth doing, making GIFs takes a bit of practice. So keep experimenting, trying new techniques, and, most importantly, having fun!
Featured Article: 10 Hottest Content Marketing Trends in 2025
How to Make a GIF on an iPhone
If you’re an iPhone user, creating a GIF is as easy as pie. Follow these simple steps:
Step 1: Open your Photos app and find the Live Photo you want to transform into a GIF. Live Photos are those images that capture a few seconds of motion and sound.
Step 2: Once you’ve selected your Live Photo, tap on it to open it up. Now, swipe up on the photo to reveal the Effects section. This is where the magic happens!
Step 3: In the Effects section, you’ll see options like Loop, Bounce, and Long Exposure. You can apply these effects to your Live Photo to turn it into a GIF. For a classic looping GIF effect, select “Loop.”
Step 4: After choosing your desired effect, tap “Done” in the top-right corner of the screen. Your iPhone will work magic and convert your Live Photo into a GIF.
Step 5: Once the conversion is complete, your GIF will be saved to your Photos library alongside your Live Photo. You can now view, share, and enjoy your newly created GIF with friends and family.
How to Make a GIF on Android
Android users, we’ve got you! Making a GIF on your device is a breeze. Here’s how:
Step 1: Head over to the Google Play Store and search for a GIF-making app that suits your fancy. There are plenty to choose from, like GIPHY Cam, GIF Maker, or ImgPlay. Once you’ve found one you like, download and install it on your device.
Step 2: Open the GIF-making app and prepare to bring your creativity to life! Most apps will prompt you to select the images or videos you want to include in your GIF. You can choose multiple photos or a short video clip – it’s up to you!
Step 3: Now comes the fun part – customizing your GIF. Depending on the app you’re using, you’ll have various options to play around with. Add filters to give your GIF a unique look, apply effects to add some energy, and even add text overlays to convey a message or punchline.
Step 4: Once you’re happy with how your GIF looks, it’s time to save or share your masterpiece. Most GIF-making apps will allow you to save your GIF directly to your device’s gallery. From there, you can share it with friends via messaging apps, social media, or wherever possible.
How to Make a GIF in Photoshop
Photoshop offers a robust platform for creating GIFs for those who prefer a more hands-on approach. Here’s a basic rundown:
Step 1: Launch Adobe Photoshop on your computer and start a new project. Once you’re in, import the images or video frames you want to include in your GIF. You can do this by going to File Open and selecting the files you want to use.
Step 2: After importing your images or video frames, Photoshop automatically opens them as individual layers. Arrange these layers in the desired sequence by dragging and dropping them in the Layers panel. This will determine the order in which they appear in your GIF.
Step 3: With your layers in place, it’s time to set the frame delay for each one. This determines how long each frame will be displayed before moving on to the next. To do this, select each layer in the Layers panel and adjust the frame delay in the Animation panel. You can also specify if you want specific frames to hold longer than others for added effect.
Step 4: Once you’ve set the frame delay for each layer, it’s time to preview your GIF to see how it looks. Go to Window > Timeline to open the Animation panel, then hit the play button to preview your GIF. If you’re happy with how it looks, great! If not, you can make any necessary adjustments to the timing or positioning of your layers.
Step 5: Finally, it’s time to save your GIF. Go to File > Export > Save for Web (Legacy) to open the Save for Web dialog box. Here, you can choose the GIF format and adjust settings like the number of colors and dithering options to optimize your GIF for the web. Once you’re satisfied with your settings, hit the Save button to save your GIF to your desired location.
How to Make a GIF With a Video
Converting a video into a GIF is a gift with the right tools. Here’s how to do it:
Step 1: Select a video clip you want to convert into a GIF. This could be a funny moment from a family gathering, a cute animal video, or anything else that catches your eye.
Step 2: Next, you’ll need to use a tool or software to convert the video into a GIF. There are several options available, including online converters and dedicated GIF-making software. For online converters, simply upload your video file and follow the on-screen instructions to trim the video, adjust settings like size and frame rate, and customize any other options.
If you prefer using software, there are plenty of options available for both desktop and mobile devices, such as Adobe Photoshop, GIMP, or even mobile apps like GIPHY Cam or GIF Maker.
Step 3: Once you’ve finished editing and customizing your GIF, it’s time to convert the video into GIF format. Depending on your tool or software, this process may vary slightly, but most platforms will have a specific option or button to convert the video into a GIF. Simply click on this option and wait for the conversion process to complete.
Step 4: Finally, once your video has been converted into a GIF, it’s time to save your creation and share it with the world! Most tools and software will allow you to save the GIF directly to your device or computer, making it easy to access and share with friends, family, or followers on social media platforms like Facebook, Twitter, or Instagram.
How to Make a GIF From Images on Android Using Gallery
If you want to turn a series of photos into a GIF, you can do so using the Gallery app on your Android device. Here’s how:
Step 1: Start by opening the Gallery app on your Android device. Once you’re in the app, navigate to the folder containing the photos you want to include in your GIF. You can select multiple images by tapping and holding on the first photo, then tapping on the others to add them to your selection.
Step 2: With your photos selected, tap on the “More” option, usually represented by three vertical dots in the screen’s upper-right corner. This will open a dropdown menu of additional options.
Step 3: From the dropdown menu, select the “Create GIF” option. This will open the GIF creation tool within the Gallery app.
Step 4: Now, you’ll have the opportunity to adjust the settings for your GIF. This includes options such as the speed of the animation and the loop mode (e.g., forward, backward, or ping-pong). Play around with these settings until you’re satisfied with the look and feel of your GIF.
Step 5: Once you’ve customized your GIF to your liking, tap the “Save” button to save your creation to your device. Depending on your device and settings, you can choose the location where you want to save the GIF.
Step 6: There you have it! You’ve successfully created a GIF from images using the Gallery app on your Android device. You can now view and share your GIF with friends and family or upload it to your favorite social media platforms to showcase your creativity.
How to Make a GIF From Pictures on Android Using Camera
If you want to create a GIF from scratch using your Android device’s camera, you can do so using the Camera app. Here’s how:
Step 1: Open the Camera app on your Android device, set it to Video mode, and record a short video clip by pressing the record button. Aim to capture the moment or scene you want to turn into a GIF, whether it’s a funny facial expression, a cute pet trick, or a beautiful sunset.
Step 2: After recording your video clip, tap on the “More” option, usually represented by three vertical dots or lines on the screen. This will open a menu of additional options and settings.
Step 3: Select the “Create GIF” option from the menu. This will open the GIF creation tool within the Camera app, allowing you to trim the video clip and adjust the GIF settings.
Step 4: Use the trimming tool to select the portion of the video clip you want to use for your GIF. You can drag the handles on either end of the timeline to adjust the start and end points of the GIF.
Step 5: Once you’ve trimmed the video clip to your satisfaction, you can further customize the GIF settings, such as the playback speed and loop mode. Experiment with these settings until you achieve the look and feel you desire for your GIF.
Step 6: When you’re happy with your GIF, tap the “Save” button to save it to your device. Depending on your device and settings, you can choose the location where you want to save the GIF.
Step 7: You can now view and share your GIF with friends and family or upload it to your favorite social media platforms to showcase your creativity.
How to Make a GIF From a YouTube Video
Have you ever watched a hilarious YouTube video and wished you could turn it into a GIF? Well, now you can! Here’s how:
Step 1: Find your YouTube video to convert to a GIF. You can do this by heading over to the YouTube website or opening the YouTube app on your device. Once you’ve found the video you want, note the video’s URL.
Step 2: With the video URL in hand, copy it to your device’s clipboard. You can usually do this by tapping and holding on the URL and selecting the “Copy” option from the context menu that appears.
Step 3: Open a GIF-making website or app supporting video conversion. There are several options available, including popular platforms like GIPHY and Imgflip. Go to the video conversion tool once you’ve chosen a website or app.
Step 4: Paste the YouTube video URL into the provided field on the GIF-making website or app. This will load the video into the conversion tool, allowing you to trim the video clip and adjust the settings as desired.
Step 5: Use the trimming tool to select the portion of the video you want to use for your GIF. You can drag the handles on either end of the timeline to adjust the start and end points of the GIF. Additionally, you can change settings, such as the GIF’s size, quality, and playback speed, to customize the final output.
Step 6: Once satisfied with your settings, initiate the video-to-GIF conversion process. This may involve clicking a “Convert” or “Create GIF” button, depending on the GIF-making website or app you’re using. Wait for the conversion process to complete, which may take a few moments, depending on the length and complexity of the video.
Step 7: Once the conversion is complete, you’ll be prompted to save your GIF to your device. Follow the on-screen instructions to save the GIF to a location of your choice, such as your device’s photo gallery or file manager
Related Article: How to Get Subscribers on YouTube in 2025
Types of GIFs
Now that you’ve mastered making GIFs from each platform let’s talk about the wonderful world of GIFs and all the different types you can find out there! From reaction GIFs to cinematography, a whole spectrum of GIFs is waiting to be explored. So, grab a seat, and let’s jump right in.
Reaction GIFs:

Reaction GIFs Reaction GIFs are the most common type you’ll come across. They’re those short snippets of people or characters reacting to something – laughter, surprise, or facepalming. For example, think of the classic Michael Jackson popcorn GIF, where he’s sitting back and enjoying the show. It’s perfect for when you’re just chilling and watching the drama unfold.
- Meme GIFs:

Meme GIFs Meme GIFs are like the lifeblood of internet culture. They’re those iconic clips or images that get shared repeatedly, usually accompanied by some witty text. Take the “Distracted Boyfriend” meme, for instance. You know, the one where the guy is checking out another girl while his girlfriend looks on in disbelief. It’s become a staple reaction GIF for situations involving temptation or betrayal.
- Cinemagraphs:

Cinemagraphs Cinemagraphs are more subtle and artistic compared to traditional GIFs. They’re still photos with a small, looping animation added in. Picture a landscape shot with a gentle breeze rustling through the trees or a cup of coffee with steam rising lazily from the surface. Cinemagraphs add a touch of elegance and intrigue to your GIF collection, making them perfect for setting the mood on your blog or social media feed.
- Text GIFs:
https://giphy.com/gifs/pienteronline-homeoffice-workaholic-workworkwork-H1SAQudLBX448crik5Text GIFs are exactly what they sound like – GIFs with text overlays. They’re great for conveying messages or emphasizing key points in a visually engaging way. For example, you might see a GIF of a cat typing furiously on a keyboard with the words “Work Work Work” flashing at the bottom. It’s a fun and creative way to express yourself and add personality to your digital conversations.
- Stop-Motion GIFs:
Stop-Motion GIFs GIFs are like mini-movies made up of still images. They’re created by taking photos of a scene or object and then stitching them together to create the illusion of movement. You’ll often see stop-motion GIFs used in DIY tutorials or product demos, showcasing the step-by-step process in a fun and engaging way. Think of those mesmerizing cooking GIFs where ingredients magically come together to form a delicious dish.


In Conclusion
So, there you have it – the lowdown on how to make a GIF! From understanding what GIFs are to mastering the art of how to make a GIF on your own, we’ve covered it all. But before you go off and start crafting your GIF masterpieces, let’s recap a bit. Making GIFs is not just about sharing funny clips or reactions – it’s about expressing yourself in a new way. It’s about adding that extra spark to your conversations and social media posts, making them more engaging and memorable.
Sure, it might take a bit of practice to get the hang of it, but trust us, it’s worth it. So don’t be afraid to bar in, experiment with different tools and techniques, and most importantly, have fun with it! Who knows? Maybe your next GIF will be the next big internet sensation. So go ahead, get creative, and let your imagination run wild!